
Some desserts ask a lot of you. They ask for a preheated oven, a timer you cannot ignore, and a kitchen that ends up hotter than you wanted it to be. No-bake peanut butter bars ask for almost nothing. You melt, you stir, you press, you chill, and a couple of hours later you have a tray of rich, salty-sweet bars with a chocolate top that snaps just enough when you bite into it. They are the dessert I make when the oven is already busy, when it is too hot to bake, or when I simply want something sweet without turning the afternoon into a project.
The combination is a classic for a reason. Peanut butter brings salt and richness, powdered sugar brings sweetness and structure, butter binds it all together, and a layer of melted chocolate on top gives the bars a finish that makes them feel like something you bought from a good bakery, even though they took about twenty minutes of actual work. If you like peanut butter cups, you will like these bars. They taste very similar, but they are easier to make in a large batch, easier to cut into neat squares, and much easier to share.
I first made a version of these bars for a school bake sale, back when I needed something that would survive a warm hall, travel well in a tin, and not fall apart when people picked it up. They sold out before most of the cakes did, and I have been making them ever since for picnics, lunchboxes, and evenings when friends come over and someone inevitably says, “Is there anything sweet?” There usually is, if I have remembered to make a tray the day before. They keep well, they freeze well, and they are one of the few desserts that actually improves after a night in the fridge, when the base firms up properly and the flavours settle.
This recipe makes a tray of about 24 bars, depending on how generously you cut them. They are rich, so small squares are genuinely enough, though I would not blame anyone for going back for a second. The method is simple enough for a beginner, and there is no baking skill required at all, which makes it a wonderful recipe to make with children, provided an adult handles the hot melted butter and chocolate.
Why These Bars Work So Well
The secret to a good no-bake bar is balance, and it comes down to the ratio of peanut butter to powdered sugar to butter. Too much peanut butter and the base will be soft and greasy, never quite setting. Too much powdered sugar and it will be dry, crumbly, and chalky. Too little butter and it will not hold together at all. The ratio here, one cup of peanut butter to two cups of powdered sugar and half a cup of butter, with a cup of graham cracker crumbs for structure, has been tested in my kitchen more times than I can count, and it gives a base that is firm enough to slice cleanly but soft enough to bite through without crumbling.
The graham cracker crumbs do more work than people realise. They absorb some of the oil from the peanut butter, which stops the base from feeling greasy, and they give the bars a texture that is more interesting than peanut butter and sugar alone. If you cannot find graham crackers, digestive biscuits work just as well, and they bring a slightly maltier flavour that suits the chocolate top. Crushing them finely is important. Large pieces will make the base uneven and harder to press flat, while fine crumbs pack together into a smooth, even layer.
The chocolate topping is the other half of the recipe, and it needs a little care too. Melted chocolate on its own sets very hard in the fridge, which means it can crack and shatter when you cut the bars, lifting away from the base in large pieces. Stirring a tablespoon or two of peanut butter into the melted chocolate solves this. It softens the chocolate just enough that it cuts cleanly, and it ties the topping to the base flavour-wise, so the whole bar tastes like one thing rather than two separate layers. A pinch of salt in the chocolate also helps, especially if you are using milk chocolate, which can otherwise taste one-note sweet.
Using the right peanut butter matters as well. Smooth, conventional peanut butter, the kind that does not separate in the jar, gives the most reliable result. Natural peanut butter, which separates and needs stirring, can work, but the oil content varies, and the base may end up softer or greasier than intended. If natural peanut butter is all you have, stir it very thoroughly first, and consider adding an extra two tablespoons of crumbs. Crunchy peanut butter is a different question. It works, and some people prefer the texture, but it makes the base a little harder to press flat, and the bars will be slightly more crumbly. Smooth is the safest choice for your first tray.
Ingredients You Will Need
For the peanut butter base:
- 1 cup (240 g) smooth peanut butter
- 1/2 cup (115 g) unsalted butter, melted
- 2 cups (240 g) powdered sugar, sifted
- 1 cup (100 g) graham cracker crumbs, finely crushed
- 1 teaspoon vanilla extract
- 1/4 teaspoon fine salt
For the chocolate topping:
- 1 1/2 cups (260 g) chocolate chips, milk or semisweet
- 2 tablespoons smooth peanut butter
- Pinch of flaky sea salt, optional
A note on the chocolate, because it changes the character of the bars quite a bit. Milk chocolate gives you the classic peanut butter cup flavour, sweet and familiar, and it is the best choice if you are making these for children or for people who prefer a sweeter dessert. Semisweet chocolate gives a more grown-up bar, with a darker, slightly bitter top that balances the sweet base beautifully. I tend to use semisweet myself, but there is no wrong answer here. You can even use half milk and half semisweet, which lands somewhere in the middle and pleases almost everyone.
The powdered sugar should be sifted, and I know that sounds like an unnecessary step, but lumps of powdered sugar do not dissolve in a no-bake base the way they would in a baked cake. They stay as small, chalky pockets, and they are noticeable when you bite into a bar. Sifting takes a minute and it makes the base smooth. If your powdered sugar is very fresh and lump-free, you can skip it, but check it first by running your fingers through it. For background on the main ingredient, the article on peanut butter on Wikipedia covers how it is made and why different types behave differently.
How to Make No-Bake Peanut Butter Bars
Line a 9 by 9 inch baking pan with baking paper, leaving an overhang on two sides so you can lift the bars out later. This is the step that makes cutting and serving easy, and it is worth doing even if you are in a hurry. A pan without paper will release the bars eventually, but you will lose the neat edges and probably a few bars to the pan in the process. If you do not have a square pan, a similar-sized rectangular pan works, though the bars will be slightly thinner.
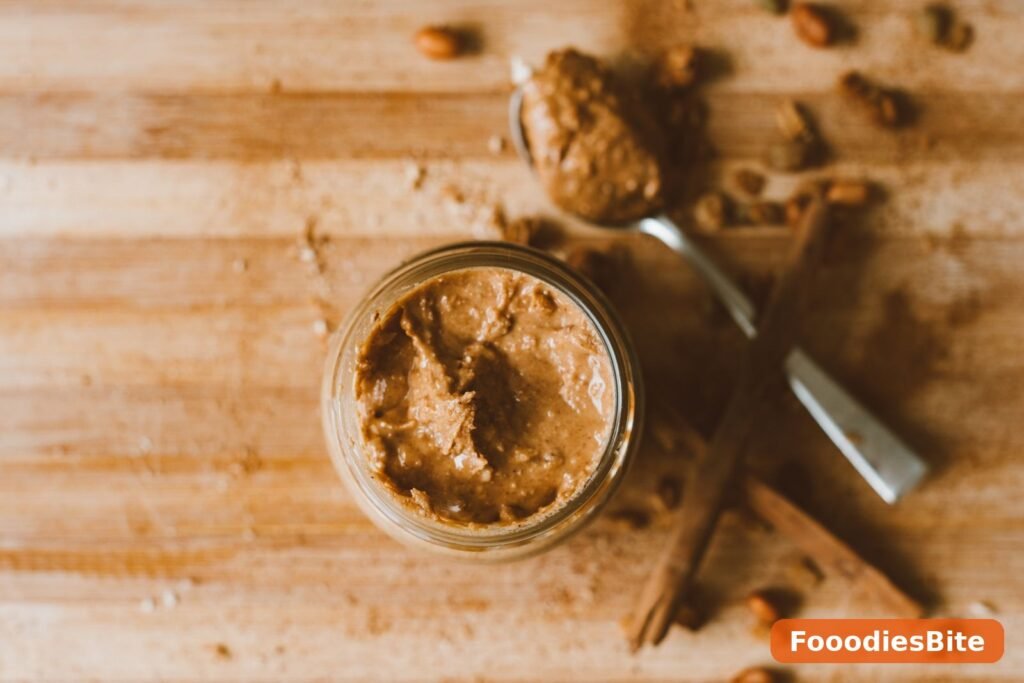
Put the peanut butter and melted butter in a large bowl and stir them together until smooth. The melted butter should be warm, not hot, so it blends easily without cooking anything. Add the vanilla extract and salt, and stir again. Now add the sifted powdered sugar and the graham cracker crumbs. Stir with a wooden spoon or a sturdy spatula until everything is combined. The mixture will be thick and a little stiff, almost like a dough, and that is exactly right. If it feels dry and will not come together, add a tablespoon more melted butter. If it feels greasy or soft, add a tablespoon more crumbs. Small adjustments like this are normal, since peanut butter varies from brand to brand.
Tip the mixture into the lined pan and press it down firmly and evenly. This is the most important physical step in the whole recipe. Use the bottom of a measuring cup or a flat-bottomed glass to press the base down, working from the centre out to the corners. You want a compact, even layer with no air pockets and no thin spots. If the base is not pressed firmly, the bars will crumble when you cut them. Take your time here. A minute of proper pressing saves a tray of broken bars later.
To make the topping, melt the chocolate chips in a heatproof bowl set over a pan of barely simmering water, or in the microwave in short bursts of 20 seconds, stirring between each burst. Do not let the chocolate get too hot, or it will seize and turn grainy. As soon as it is mostly melted, take it off the heat and stir until smooth. Stir in the two tablespoons of peanut butter until the mixture is glossy and uniform. Pour the chocolate over the peanut butter base and spread it evenly with a spatula, right to the edges. Sprinkle with flaky sea salt if you are using it.
Refrigerate the tray for at least two hours, or until the chocolate is firm and the base is set. Two hours is the minimum. Overnight is even better, and it means you can make the bars a day ahead without any last-minute work. When you are ready to serve, lift the whole slab out of the pan using the paper overhang, and place it on a cutting board. Use a large, sharp knife, and run it under hot water and dry it between cuts if you want very neat squares. Cut into 24 bars, or 16 larger ones if you prefer. Let the bars sit at room temperature for ten minutes before serving, so the chocolate is not ice cold and the base is at its best texture.
Variations Worth Trying
The basic bar is wonderful on its own, but it is also a blank canvas. For a pretzel version, press a layer of crushed pretzels into the top of the chocolate before it sets. The salty crunch is a perfect match for the sweet peanut butter, and it makes the bars look and taste a little more special. For a s’mores-inspired version, sprinkle mini marshmallows and extra graham cracker crumbs over the chocolate, and toast them very briefly with a kitchen torch if you have one. They will not be exactly like s’mores, but they capture the same spirit.
A banana version is surprisingly good. Stir a tablespoon of banana chips, crushed, into the base, or top the bars with thin slices of dried banana before the chocolate sets. The banana flavour is subtle, but it adds a tropical note that works well with peanut butter. A coffee version, made by adding a teaspoon of instant espresso powder to the melted chocolate, is more grown-up and less sweet-tasting, and it is a good choice if you are serving the bars after dinner with coffee.
For a healthier-leaning version, you can reduce the powdered sugar to one and a half cups and increase the crumbs slightly, though the bars will be less sweet and a little less firm. You can also use dark chocolate for the topping, which is lower in sugar than milk chocolate. I would not try to make these bars sugar-free, since the sugar is structural as well as sweet, but small reductions are fine if you prefer a less sweet dessert. The bars will still set, though they may be slightly softer, so give them a little longer in the fridge.
If you want more no-fuss desserts, the Desserts & Baking archive has plenty to browse, and the FooodiesBite homepage is a good place to start when you are looking for your next bake, or no-bake.
Common Mistakes and How to Avoid Them
The most common problem with no-bake bars is a base that will not set, and it usually comes from too much liquid or too little structure. If you used natural peanut butter without adjusting the crumbs, or if you added extra melted butter to make mixing easier, the base may stay soft even after hours in the fridge. The fix is simple. Put the tray back in the fridge for longer, and next time, add the crumbs gradually and stop when the mixture feels like a firm dough. A base that is too soft to cut can often be saved by freezing it for half an hour before slicing, which firms it up enough to cut cleanly.
The opposite problem, a base that crumbles, usually means it was not pressed firmly enough, or there was too much powdered sugar. Pressing is not a step to rush. Use a flat-bottomed cup, press hard, and check the corners, which are the places most likely to be loose. If your bars are already made and crumbling, serve them in a bowl with a spoon and call them a peanut butter crumble. No one will complain, and you will have learned what to do differently next time.
Chocolate that cracks when you cut it is the third common issue, and it is almost always because the chocolate was too cold or too thick. Let the bars sit at room temperature for ten minutes before cutting, use a hot, dry knife, and make sure you stirred peanut butter into the chocolate, which softens it. If the chocolate still cracks, score it lightly with a knife before it fully sets, about 30 minutes into chilling, and then cut along the scored lines later. This gives the chocolate a place to break cleanly.
Another mistake is using a pan that is too large. A thin base in a large pan will set too hard and taste more like chocolate than peanut butter, while a thick base in a small pan may not set in the middle. A 9 by 9 inch pan is the right size for this recipe. If you double the recipe, use a 9 by 13 inch pan rather than two small ones, and add a little extra chilling time, since a larger slab takes longer to set all the way through.
Storing and Keeping Them Fresh
No-bake peanut butter bars keep beautifully in the fridge for up to a week, stored in an airtight container with layers separated by baking paper. They actually taste better after a day or two, when the base has firmed up and the flavours have melded. Keep them in the fridge rather than at room temperature, especially in warm weather, since the chocolate will soften and the base will become sticky if left out for too long. A brief spell at room temperature before serving is fine, but an afternoon on a warm counter is not ideal.
They also freeze exceptionally well, which makes them a perfect make-ahead dessert. Cut them into bars first, then freeze them in a single layer on a tray until solid, and transfer them to a freezer bag or container. They will keep for up to two months. Thaw them in the fridge for a couple of hours, or at room temperature for about 20 minutes, before serving. Frozen bars, eaten straight from the freezer, are also surprisingly good, though the chocolate will be very firm. For a lunchbox, a frozen bar will thaw by lunchtime and keep the rest of the lunch cool, which is a useful trick in warmer months.
Serving Ideas

The simplest way to serve these bars is on a plate, at room temperature, with nothing else. They are rich enough to stand alone, and they do not need ice cream or cream to be satisfying. That said, a small scoop of vanilla ice cream alongside a bar, with a drizzle of extra melted chocolate, turns them into a proper dessert for guests. A cup of coffee or a glass of cold milk is the classic accompaniment, and for good reason. The bitterness of coffee and the coolness of milk both balance the sweetness of the bars in a way that water does not quite manage.
For a party, cut the bars small, about one inch square, and arrange them on a platter with other bite-sized treats. Small bars are easier to eat standing up, they look generous on a table, and people can try one without committing to a large, rich portion. For a bake sale, wrap individual bars in baking paper and tie them with string. They travel well, they do not need refrigeration for a few hours, and they look charming in a way that a plastic tub of brownies does not. For a lunchbox, one bar alongside fruit and a sandwich is a treat that feels special without being over the top.
They also make a thoughtful gift. A tin of peanut butter bars, with a note explaining that they are no-bake and keep well in the fridge, is a kind present for a new neighbour, a friend who has just moved house, or anyone who has had a busy week and deserves something sweet. I have given them more times than I can count, and they are always appreciated, partly because they taste good and partly because they are clearly homemade. If you are planning a meal first, something simple and satisfying works best before such a rich dessert, and One-Pot Chicken and Rice Without Soup is a comforting main course that leaves room for a sweet finish.
Frequently Asked Questions
Can I use natural peanut butter?
You can, but with a caveat. Natural peanut butter separates, and the amount of oil in the jar varies from top to bottom, which means the base may be softer or greasier than intended. Stir the jar very thoroughly first, until the oil is fully mixed in, and add an extra two tablespoons of graham cracker crumbs to compensate. The bars will still taste wonderful, and some people prefer the more intense peanut flavour of natural peanut butter, but smooth, conventional peanut butter gives a more reliable result, especially for your first tray.
Do I need to refrigerate these bars?
Yes, for storage. The bars need to be refrigerated to set properly, and they should be kept in the fridge between servings, especially in warm weather. They can sit at room temperature for an hour or two while being served, and they actually taste best after about ten minutes out of the fridge, when the chocolate is not ice cold. But for longer storage, the fridge is essential. At room temperature, the chocolate will soften, the base will become sticky, and the bars will lose their neat shape. For more peanut butter dessert ideas, the peanut butter bars recipe from BBC Good Food is worth a look for comparison.
Can I make these bars gluten-free?
Yes, easily. Replace the graham cracker crumbs with gluten-free biscuit crumbs, or with finely ground gluten-free oats. Both work well, though oats will give a slightly different texture, a little chewier and less crisp. Check that your chocolate chips are gluten-free as well, since some brands are made in facilities that handle wheat. The rest of the ingredients, peanut butter, butter, powdered sugar, and vanilla, are naturally gluten-free. The bars will set and slice just as well as the original.
Why did my chocolate topping crack?
Cracking usually happens because the chocolate was too cold or too hard when you cut the bars. The peanut butter stirred into the chocolate helps, but it does not eliminate the problem entirely if the bars are straight from the fridge. Let them sit at room temperature for ten minutes before cutting, use a large, sharp knife run under hot water and dried, and cut with a firm, downward motion rather than sawing. Scoring the chocolate lightly while it is still slightly soft, about 30 minutes into chilling, also helps, since it gives the chocolate a clean line to break along.
Can I use almond butter instead of peanut butter?
Yes, almond butter works as a substitute, though the flavour will be different, milder and less salty, and the bars will be slightly less firm, since almond butter is usually runnier than peanut butter. Add an extra tablespoon or two of crumbs to compensate, and consider adding a pinch more salt to make up for the saltiness that peanut butter naturally brings. Cashew butter also works, and it gives a very creamy, mild bar. Whichever nut butter you use, make sure it is smooth and well stirred, and check for nut allergies if you are serving the bars to other people.
How long do these bars last?
In the fridge, in an airtight container, they last up to a week, though they rarely survive that long in my house. In the freezer, they last up to two months, and they thaw quickly. At room temperature, they are fine for a few hours, for example at a party or a bake sale, but they should go back in the fridge afterwards. If the chocolate starts to look dull or the base feels sticky, they have been out too long. Trust your senses. Fresh bars should smell of peanut butter and chocolate, feel firm to the touch, and cut cleanly. For a lighter sweet option to balance these rich bars, the Air Fryer Recipes archive includes lighter ideas that pair well in a weekly menu.