
There is a particular smell that tells you autumn has properly arrived, and it is not the smell of leaves or rain. It is the smell of apples and cinnamon coming out of the oven, warm and sweet and a little bit buttery, filling the whole house before you have even taken the dish out. Apple crisp is the dessert that gives you that smell with the least amount of work. There is no pastry to roll, no lattice to weave, and no pie crust that might shrink or crack. You slice apples, toss them with sugar and spice, scatter a crumbly oat topping over the top, and let the oven do the rest.
I make apple crisp more often than any other dessert, partly because it is so forgiving and partly because it uses ingredients I almost always have. Apples keep for weeks in the fridge, oats live in the cupboard forever, and butter and sugar are constants. It is the dessert I turn to when friends drop by unexpectedly, when I have a bag of apples that are starting to soften, and when I want something warm and comforting without spending the afternoon in the kitchen. From the moment you start peeling to the moment you pull it out of the oven, it takes less than an hour, and most of that time the crisp is simply baking while you get on with something else.
What makes a good apple crisp is not complicated, but it is worth understanding. The apples underneath should be soft and jammy, but not mushy. They should hold enough of their shape that you can still tell you are eating apple, while their juices thicken into a sauce with the sugar and a little flour. The topping, meanwhile, should be crisp and golden, with oats that toast rather than steam, and butter that binds everything into clusters rather than a flat, soggy lid. When those two things come together, warm from the oven with a scoop of ice cream melting over the top, it is hard to think of a dessert that gives more pleasure for less effort.
This version is deliberately simple and reliable. It works with the apples you can find in any supermarket, it does not need any special equipment beyond a baking dish and a bowl, and it can be made ahead, doubled for a crowd, or adapted for different diets without losing what makes it good. If you have never baked a fruit dessert before, this is the one to start with. If you have baked dozens, this is the one you will come back to when you want something you know will work.
Why This Apple Crisp Works So Well
The difference between a good apple crisp and a disappointing one usually comes down to the apples. Some apples collapse into applesauce when baked, while others stay so firm that the topping is burnt before the fruit is soft. The best apples for crisp are firm, slightly tart varieties that hold their shape but still soften into tenderness. Granny Smith is the classic choice, and it is a good one, because its tartness balances the sweetness of the topping. Honeycrisp, Braeburn, and Pink Lady all work beautifully too, and they are a little sweeter, which means you can use slightly less sugar if you prefer.
Using a mixture of apples is even better, if you have more than one variety on hand. A mix of tart and sweet apples gives the filling more depth, so it tastes like more than just sugar and cinnamon. I often use half Granny Smith and half something sweeter, and the result is a filling that is complex without being complicated. Whatever you choose, avoid apples that are already soft or mealy, like Red Delicious, which tend to turn to mush in the oven and leave you with a filling that has no texture at all.
The topping works because of the oats. Rolled oats, not instant oats, give the topping its characteristic chew and crunch. Instant oats are cut too fine and turn powdery, while steel-cut oats stay too hard. Old-fashioned rolled oats are the middle ground, and they toast beautifully in the oven. The butter should be cold and cut into small pieces, then rubbed into the flour, sugar, and oats until the mixture looks like coarse crumbs with some larger, pea-sized pieces. Those larger pieces are what become the crisp clusters everyone fights over, so do not rub the mixture until it is uniform. A little unevenness is exactly what you want.
A small amount of flour in the filling is also important, and it is a step people sometimes skip. As the apples bake, they release juice, and without something to thicken it, that juice stays thin and watery, pooling at the bottom of the dish. A tablespoon or two of flour, tossed with the apples before they go into the dish, thickens the juices into a light sauce that clings to the fruit. Cornstarch works too, but flour gives a slightly more homely texture that suits this dessert.
Ingredients You Will Need
For the apple filling:
- 6 medium apples, about 900 g, peeled, cored, and sliced
- 1/4 cup (50 g) granulated sugar
- 1/4 cup (50 g) brown sugar
- 1 tablespoon lemon juice
- 1 teaspoon ground cinnamon
- 1/4 teaspoon ground nutmeg
- 1 tablespoon plain flour
- 1 teaspoon vanilla extract
- Pinch of salt
For the oat topping:
- 1 cup (90 g) old-fashioned rolled oats
- 3/4 cup (95 g) plain flour
- 1/2 cup (100 g) brown sugar, packed
- 1/2 teaspoon ground cinnamon
- 1/4 teaspoon salt
- 1/2 cup (115 g) cold unsalted butter, cut into small cubes
- 1/2 cup (50 g) chopped walnuts or pecans, optional
A note on the sugar in the filling, because apples vary so much in sweetness. The amounts here assume a mix of tart and sweet apples. If you are using only Granny Smith, you may want an extra tablespoon of sugar. If you are using only very sweet apples, like Honeycrisp or Gala, you can cut the sugar back a little. Taste a slice of raw apple before you start. That will tell you more about how much sugar you need than any recipe can. The same applies to the lemon juice. It is not there to make the filling taste lemony. It is there to brighten the apples and stop them from browning while you work, so do not leave it out even if you are tempted.
The nuts in the topping are optional, but they add a wonderful crunch and a slightly savoury note that balances the sweetness. Walnuts and pecans both work, and they should be chopped fairly small so they distribute evenly. If you are baking for someone with a nut allergy, simply leave them out. The topping will still be crisp and delicious without them. For background on this kind of dessert, the article on apple crisp on Wikipedia explains how it differs from a crumble and a cobbler.
How to Make Easy Apple Crisp with Oat Topping
Heat the oven to 375 degrees Fahrenheit (190 degrees Celsius) and butter a baking dish, about 9 by 9 inches or a similar size. You do not need to line the dish, since the crisp is served straight from it, but a well-buttered dish makes serving much easier and stops the sugary juices from sticking stubbornly to the corners. Peel, core, and slice the apples into pieces about a quarter of an inch thick. They do not need to be perfect. In fact, slightly uneven slices are fine, because the thinner ones will soften into sauce and the thicker ones will keep their shape, giving the filling a nice variety of textures.
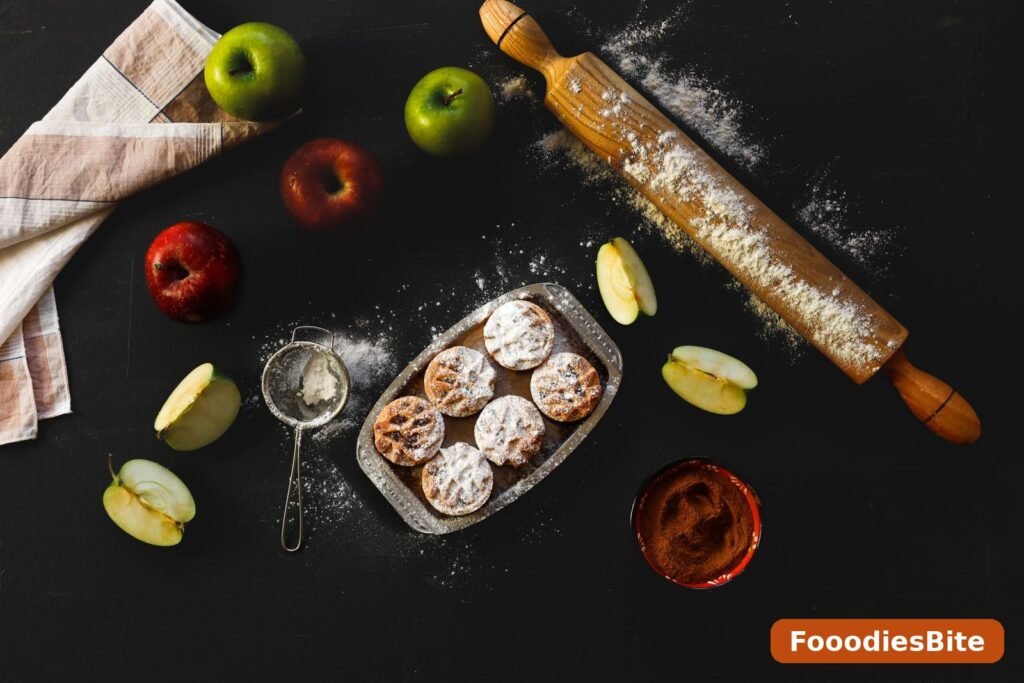
Put the sliced apples in a large bowl and add the granulated sugar, brown sugar, lemon juice, cinnamon, nutmeg, flour, vanilla, and salt. Toss everything together with your hands or a large spoon until the apples are evenly coated. You should see the sugar starting to dissolve and the spices clinging to the slices. Let the mixture sit for ten minutes while you make the topping. This short rest lets the apples release a little juice, which helps the flour thicken the filling, and it gives you time to get the topping ready without rushing.
To make the topping, combine the oats, flour, brown sugar, cinnamon, and salt in a medium bowl. Add the cold butter cubes and rub them into the dry ingredients with your fingertips, or cut them in with a pastry cutter, until the mixture forms coarse crumbs with some larger, pea-sized pieces. If you are using nuts, stir them in at the end. The mixture should feel a little dry and crumbly, not like a dough. If it starts to come together into a single mass, your butter was too warm. Put the bowl in the fridge for ten minutes and it will firm up again.
Tip the apple mixture into the prepared baking dish and spread it out evenly. Do not press it down too firmly. You want a little air between the slices so the heat can circulate. Scatter the topping evenly over the apples, right to the edges of the dish, so every serving gets a good amount of crunch. If you leave the edges bare, the apple juices will bubble up and over, and you will lose topping where you need it most. Place the dish on a baking tray to catch any juices that bubble over, and bake for 40 to 45 minutes, until the topping is deep golden brown and the apple juices are bubbling thickly around the edges.
Let the crisp cool for at least 15 minutes before serving. This is hard, because it smells wonderful and everyone will want to dig in immediately, but the filling needs time to thicken. Straight from the oven, the juices are thin and runny. After a short rest, they set into a sauce that clings to the apples instead of pooling on the plate. Serve it warm, not piping hot, with ice cream, cream, or custard.
Variations Worth Trying
Apple crisp is a wonderful base for variations, and most of them are as simple as swapping one ingredient for another. For a pear crisp, replace half the apples with ripe but firm pears, and reduce the sugar slightly, since pears are sweeter. For a mixed fruit crisp, add a handful of blackberries or raspberries to the apples. They will break down into a beautiful purple sauce that looks stunning against the golden topping, and their tartness balances the apples nicely.
A salted caramel version is popular for a reason. Drizzle a few tablespoons of caramel sauce over the apples before adding the topping, and sprinkle a pinch of flaky sea salt over the topping before baking. The caramel melts into the filling and creates pockets of buttery sweetness that are genuinely hard to resist. You can use shop-bought caramel sauce for this, and no one will mind. Similarly, a ginger version, made by adding a teaspoon of ground ginger and a tablespoon of finely chopped crystallised ginger to the filling, is warming and a little more grown-up, perfect for a cold evening.
For a gluten-free version, replace the plain flour in both the filling and the topping with a gluten-free flour blend, and make sure your oats are certified gluten-free. Oats are naturally gluten-free, but they are often processed in facilities that handle wheat, so the certification matters if you are baking for someone with coeliac disease. The result is almost indistinguishable from the original, which is not something you can say about every gluten-free adaptation. For a dairy-free version, use a plant-based butter alternative in the topping and serve with a dairy-free ice cream. The topping will be slightly less rich, but still crisp and satisfying.
If you want more dessert ideas, the Desserts & Baking archive is full of similar bakes, and the FooodiesBite homepage is a good starting point when you are browsing for your next recipe.
Common Mistakes and How to Avoid Them
The most common complaint about apple crisp is a soggy topping, and it almost always comes down to one of two things. The first is butter that was too warm when the topping was mixed. Warm butter melts into the flour and oats instead of staying in small pieces, and when it bakes, it creates a flat, greasy layer rather than crisp clusters. Keep the butter cold, work quickly, and if your kitchen is warm, chill the topping for ten minutes before scattering it over the apples. The second cause is covering the crisp while it bakes. Some recipes suggest covering the dish with foil for part of the time, but for a crisp topping, this traps steam and softens the oats. Bake it uncovered from start to finish, and the topping will stay crisp.
Another common problem is apples that are still crunchy when the topping is done. This usually means the apple slices were too thick, or the apples were a variety that stays very firm. Slice the apples no thicker than a quarter of an inch, and if you are using a particularly firm variety, you can toss the sliced apples in a covered bowl in the microwave for two minutes before assembling the crisp. This gives them a head start without turning them to mush, and it means the topping and the filling finish at the same time.
Watery filling is the third issue, and it is usually because the flour was left out or the crisp was served too soon. The flour thickens the juices, and the resting time lets them set. Both steps matter. If your filling is still watery after resting, it may be because your apples were exceptionally juicy. Next time, add an extra teaspoon of flour, or let the sliced apples sit with the sugar for 20 minutes and drain off a tablespoon or two of juice before assembling. Do not be tempted to bake the crisp for much longer to fix a watery filling, because the topping will burn long before the filling thickens.
Storing and Reheating Leftovers
Apple crisp keeps well in the fridge for three to four days, covered, though the topping will soften over time. That is unavoidable, since the topping absorbs moisture from the filling, but the flavour remains wonderful, and many people happily eat cold apple crisp straight from the fridge. To reheat, warm individual portions in the oven at 350 degrees Fahrenheit for about ten minutes, or in the microwave for a minute or two if you are in a hurry. The oven method is better for the topping, since the dry heat crisps it up again, while the microwave will warm it but leave it soft.
You can also freeze apple crisp, either baked or unbaked. To freeze it unbaked, assemble it in a freezer-safe dish, cover it tightly, and freeze for up to two months. Bake it straight from frozen, adding about 15 minutes to the baking time and covering it loosely with foil for the first 20 minutes so the topping does not burn before the apples are cooked. To freeze it baked, let it cool completely, cover it well, and freeze. Thaw overnight in the fridge and reheat in the oven. It will not be quite as crisp as a freshly baked one, but it will still be very good, and it is a useful thing to have in the freezer for unexpected guests.
Serving Ideas

The classic way to serve apple crisp is warm, with a scoop of vanilla ice cream. There is a reason this combination has lasted so long. The cold, creamy ice cream melting into the warm, spiced apples and crunchy topping is a contrast of temperature and texture that is hard to beat. If you do not have ice cream, softly whipped cream is almost as good, and warm custard is a more traditional British accompaniment that turns the crisp into a proper pudding. A spoonful of thick Greek yoghurt is a lighter option that still gives you the creamy contrast, and it makes the crisp feel suitable for breakfast the next day, which I can personally recommend.
For a dinner party, serve the crisp in individual ramekins rather than one large dish. It looks more elegant, everyone gets their own portion of topping, and you can prepare them ahead and bake them just before serving. A small jug of cream on the table lets guests help themselves, and a dusting of cinnamon over the top just before serving adds a finishing touch. For a casual family meal, serve it straight from the baking dish at the table, with the ice cream tub nearby and a stack of bowls. There is something relaxed and generous about a dessert that people serve themselves, and apple crisp suits that spirit perfectly.
Apple crisp also makes a lovely addition to a holiday table, especially at Thanksgiving or Christmas, when there are already many dishes competing for attention. It is simple enough not to overwhelm the meal, but warm and festive enough to feel special. If you are making it for a crowd, double the recipe and bake it in a larger dish, adding about ten minutes to the baking time. Check that the centre is bubbling before you take it out, since a larger dish takes longer to heat through. For a simple main course before dessert, Easy Meals With Ingredients I Have offers practical ideas that leave you with time and energy for baking.
Frequently Asked Questions
Do I need to peel the apples?
Peeling is recommended, though it is not strictly essential. Apple peel can be tough and chewy after baking, and it can separate from the flesh in a way that is not pleasant to eat. Peeling gives you a smoother, more consistent filling. That said, if you are short on time or you do not mind the texture, you can leave the peel on, especially with thin-skinned varieties. The crisp will still taste good. Most people prefer it peeled, and since peeling six apples only takes a few minutes, it is worth doing if you have the time.
Can I make apple crisp ahead of time?
Yes, and there are two good ways to do it. You can assemble the crisp completely, cover it, and refrigerate it for up to a day before baking. Take it out of the fridge 20 minutes before baking so it is not ice cold when it goes into the oven, and add five minutes to the baking time. Alternatively, you can bake it fully, let it cool, and refrigerate it, then reheat it in the oven before serving. The first method gives you a crisper topping, since the topping is baked fresh, while the second method is more convenient if you are short on oven time on the day. For more on apple varieties and baking, the apple crisp recipe from Taste of Home is a useful comparison.
What is the difference between apple crisp and apple crumble?
The main difference is the topping. An apple crisp topping contains oats, which give it a crisp, chewy texture. An apple crumble topping is usually just flour, butter, and sugar, without oats, and it tends to be more crumbly and sandy. Both are delicious, and both are baked fruit desserts, but if you like the hearty texture of oats, you want a crisp. If you prefer a finer, more buttery topping, you want a crumble. Some recipes blur the line by using a small amount of oats in a crumble, but the traditional distinction is whether oats are present.
Can I use canned apple filling?
You can, but the result will be quite different. Canned apple filling is already sweetened and thickened, and it is often much softer than fresh apples. If you use it, reduce the sugar in the filling to almost nothing, since the canned filling is already sweet, and bake the crisp for a shorter time, about 25 to 30 minutes, since the filling is already cooked. It will not taste as fresh as a crisp made with real apples, but it is a useful shortcut if you are in a real hurry. Fresh apples are worth the extra ten minutes of peeling and slicing whenever you have them.
Why is my topping not crunchy?
A topping that is not crunchy is usually the result of warm butter, too little baking time, or steam trapped during baking or storage. Make sure the butter is cold when you mix the topping, bake the crisp until the topping is deep golden rather than pale, and let it cool uncovered so steam can escape. If you cover a warm crisp with cling film, the trapped steam will soften the topping within an hour. Store leftovers uncovered in the fridge if you can, or reheat them in the oven to crisp them up again. A topping that is pale and soft is underbaked, even if the apples underneath are done, so trust the colour of the topping as your guide.
Can I make this recipe gluten-free?
Yes, it adapts very well. Replace the plain flour with a gluten-free flour blend in both the filling and the topping, and use certified gluten-free oats. The topping may be slightly less crisp than the original, because gluten-free flour absorbs moisture differently, but the difference is small, and adding a tablespoon of extra oats helps. Check that your oats are certified gluten-free, since ordinary oats are often contaminated with wheat during processing. The rest of the recipe, including the apples, sugar, spices, and butter, is naturally gluten-free. For another easy dessert idea, Small-Batch Chocolate Chip Cookies Without Brown Sugar is worth a look when you want a smaller bake.